Install Freebuild Terminal.
Two purchase paths, one OpenCode plugin. Choose where you want to pay. Both paths end with the Freebuild model selected and /freebuild-plan showing your budget.
Choose your path
/freebuild-license inside OpenCode. The plugin opens checkout and connects the key automatically.
Browser-first
Buy on the pricing page. After checkout, connect the key with /freebuild-key.
| Path | Where you pay | How the key connects | Best for |
|---|---|---|---|
| Terminal-first | Checkout opened by /freebuild-license | Automatic. The plugin polls the activation and connects the key. | You are already in OpenCode. |
| Browser-first | Pricing page on freebuild.dev | Manual. Run /freebuild-key and paste the key. | You want to buy before installing, or pay on another device. |
opencode works, a browser, and access to the email you will use. You do not need a license to install the plugin.Terminal-first install
Use this if you want OpenCode to start checkout and connect the license for you.
Install the plugin
Run this in your normal terminal. It does not start a subscription.
opencode plugin add @freebuild/opencode@latest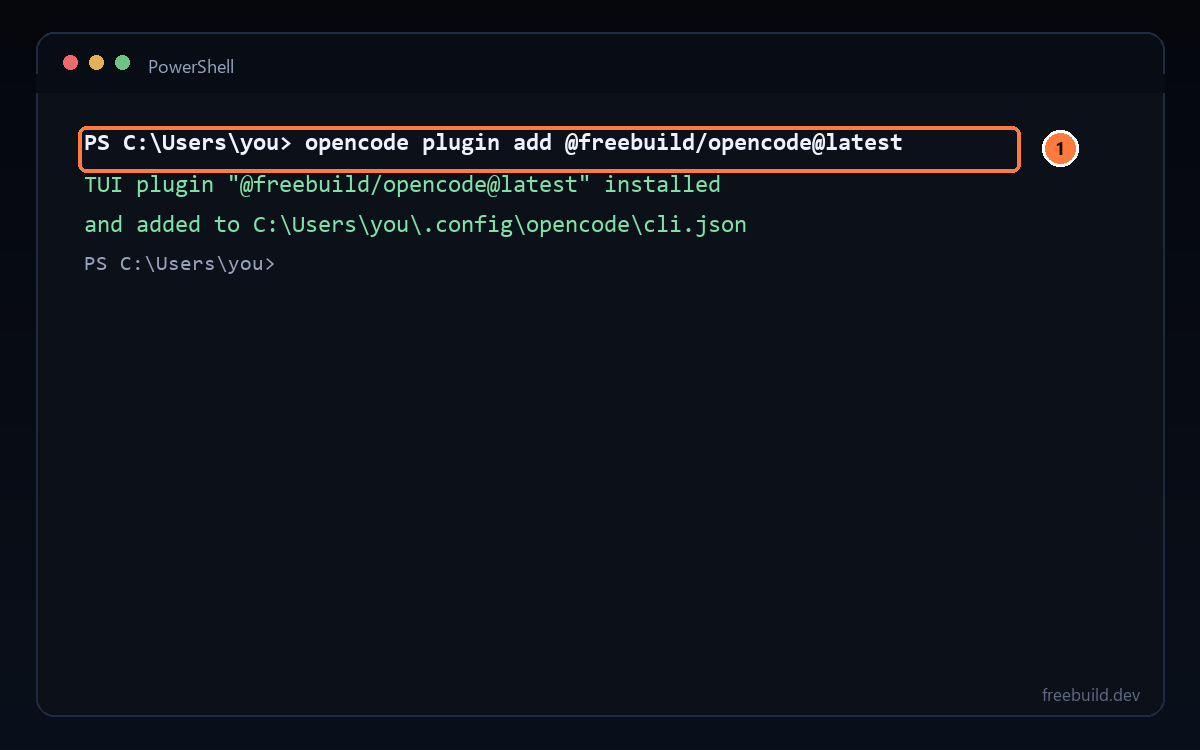
You should see: a TUI plugin installed message that includes @freebuild/opencode@latest.
Restart OpenCode
Quit every OpenCode window, then open it again. The plugin loads at startup.
If you use a background service, make sure no old opencode process is still running. A stale process keeps the previous install ID and provider list.
Run the license command
Inside OpenCode, type the command. The plugin opens the activation page in your browser.
/freebuild-license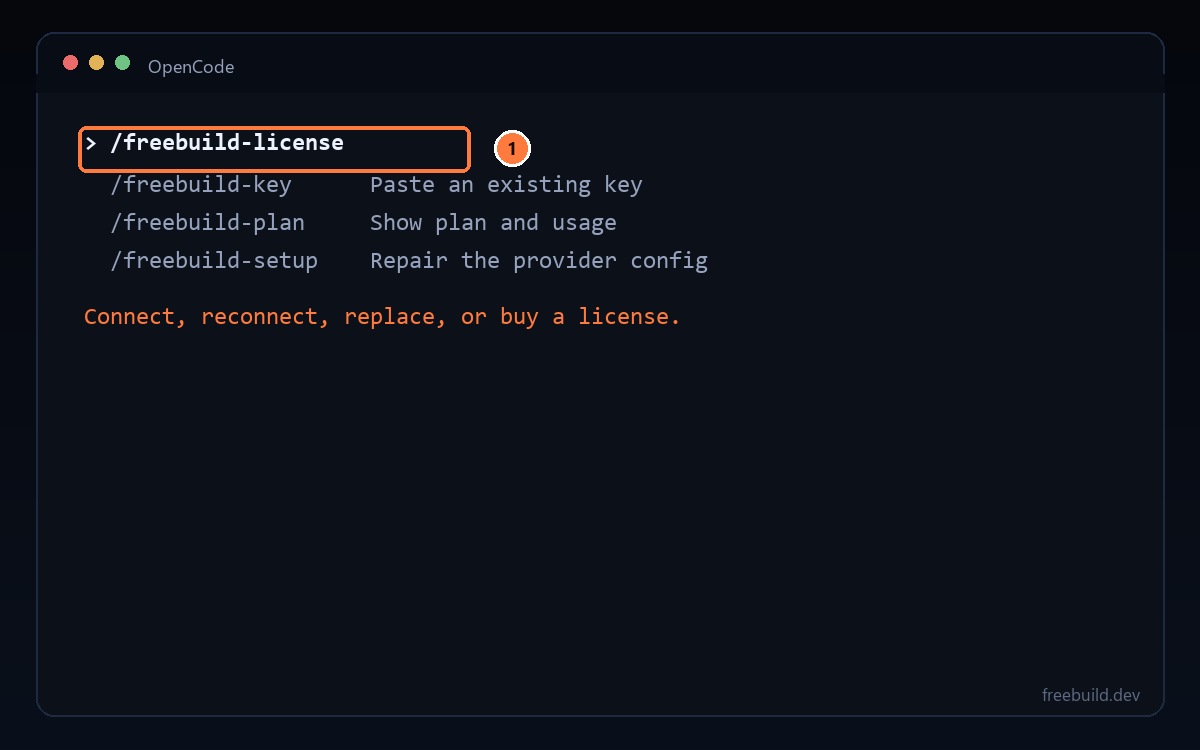
/freebuild-license from the OpenCode command palette.You should see: the activation page opens in your browser. Keep the OpenCode window open.
Verify your email
Enter the email that should own the license. Click Send code, then enter the 6-digit code and click Verify email.
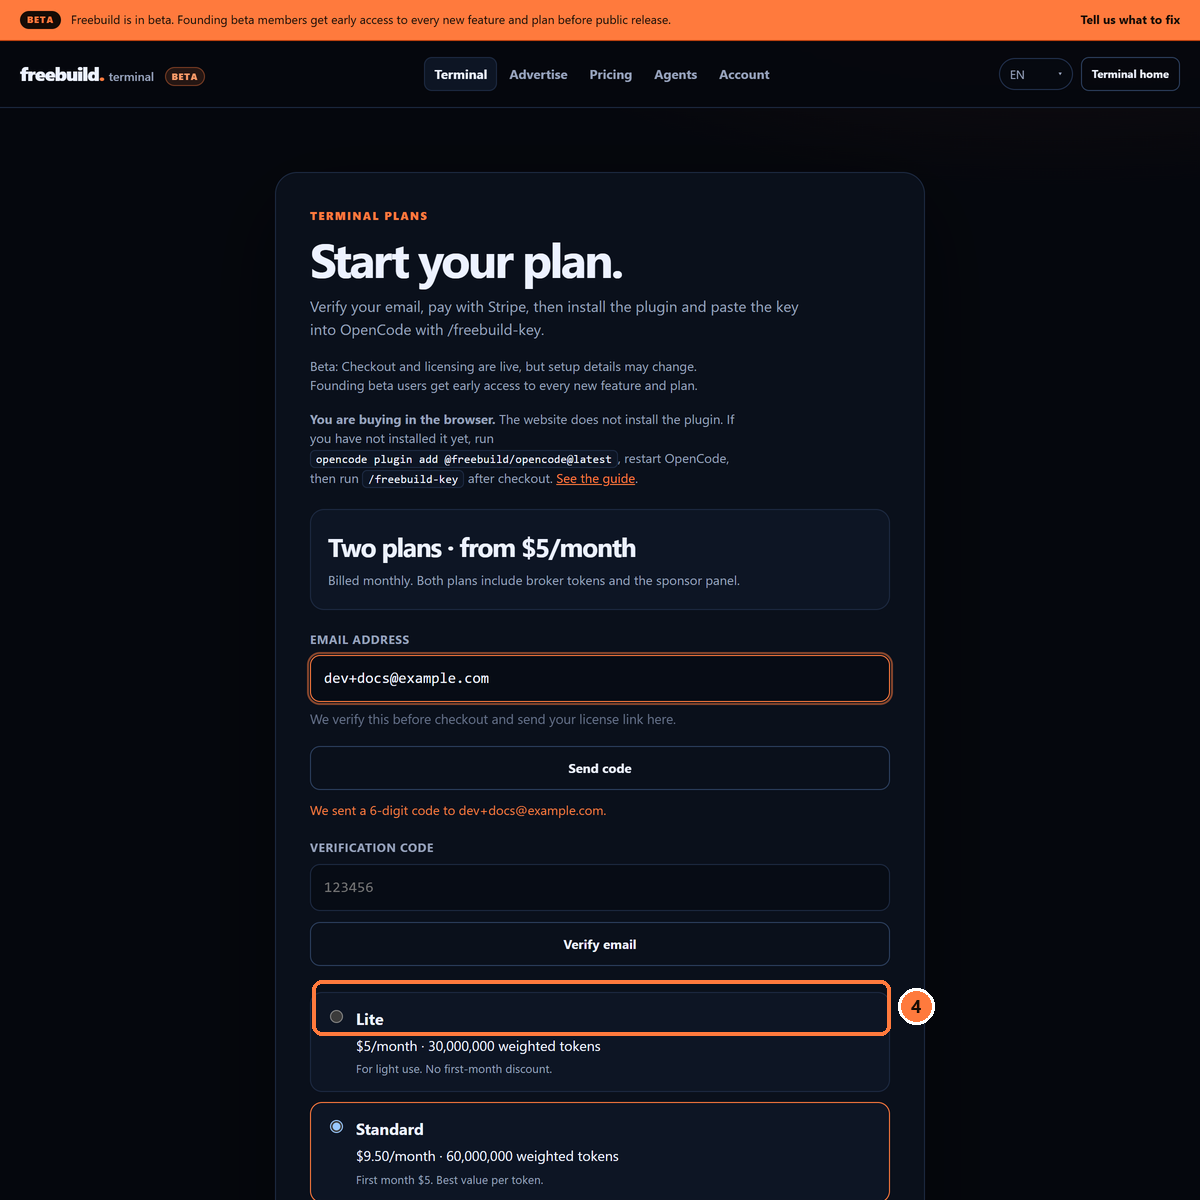
You should see: Email verified. Continue to checkout.
Choose a plan and pay
Lite is $5/month for 30M weighted tokens. Standard is $9.50/month for 60M, first month $5. The sponsor panel is included in both.
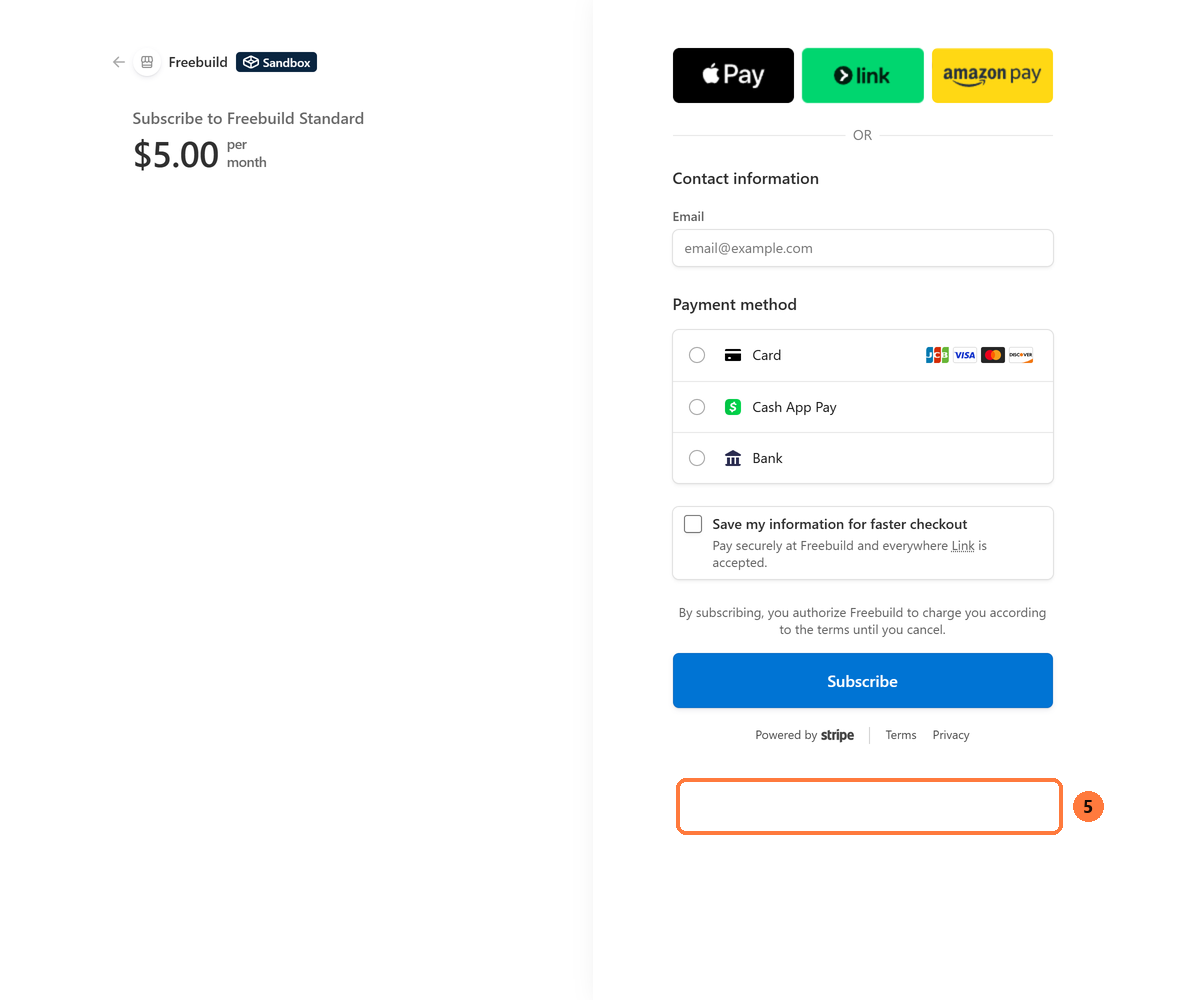
You should see: the plan name, the first-month total, and the Freebuild terms line.
Return to OpenCode
The plugin polls the activation while checkout finishes. When the webhook issues the license, the plugin stores the key, writes the provider config, and selects the model.
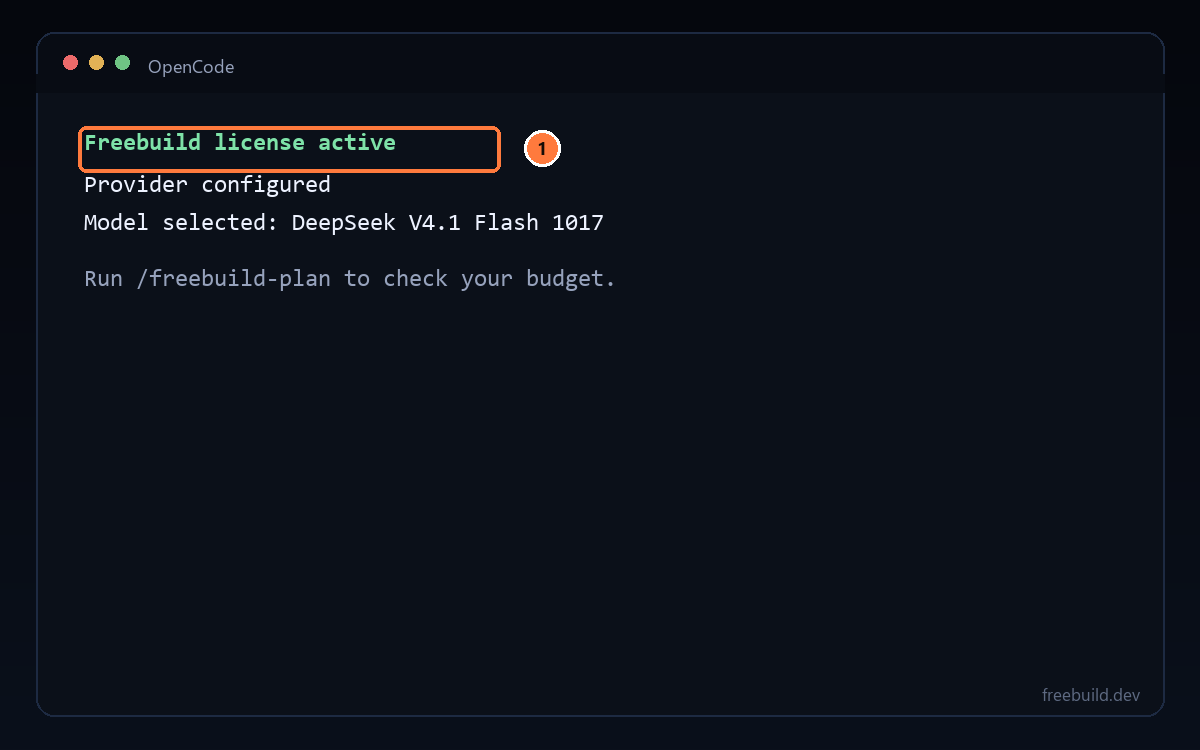
You should see: a Freebuild license active message and the remaining setup steps.
Select the model
Choose Freebuild and DeepSeek V4.1 Flash 1017.
/models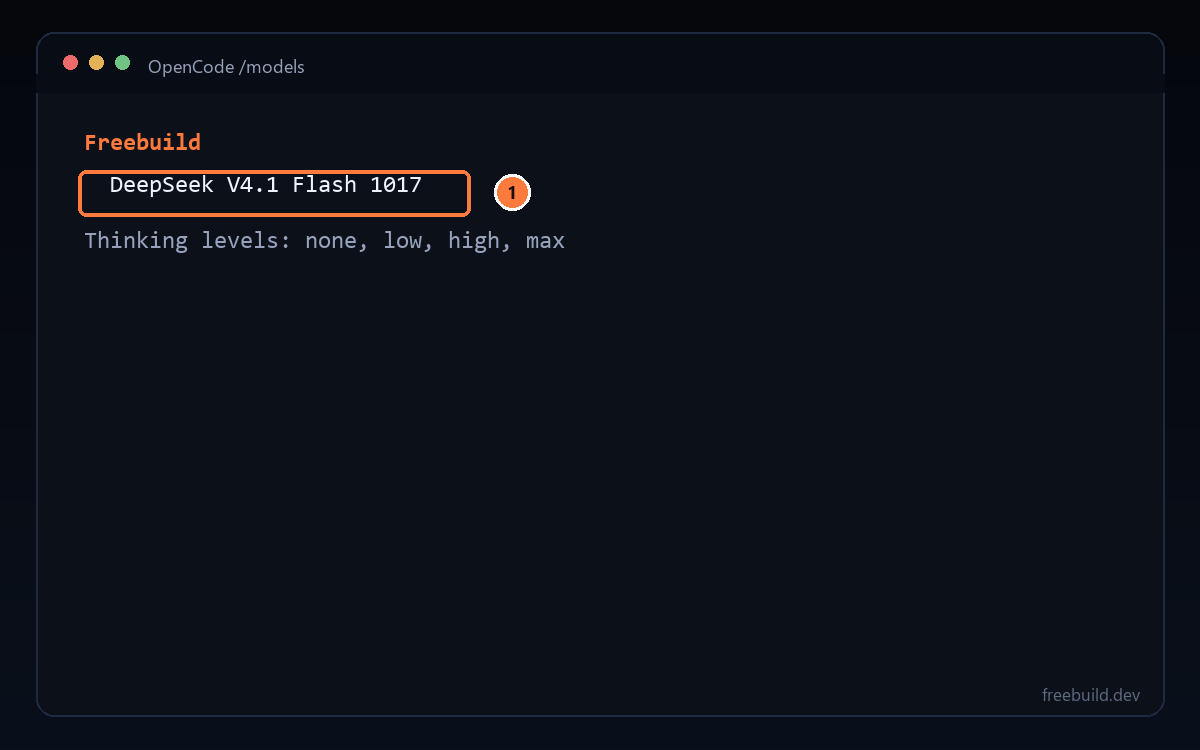
You should see: Freebuild and DeepSeek V4.1 Flash 1017.
Verify the meter
Check the weighted limit, raw tokens, and cache hit rate. The billing period is on the account page.
/freebuild-plan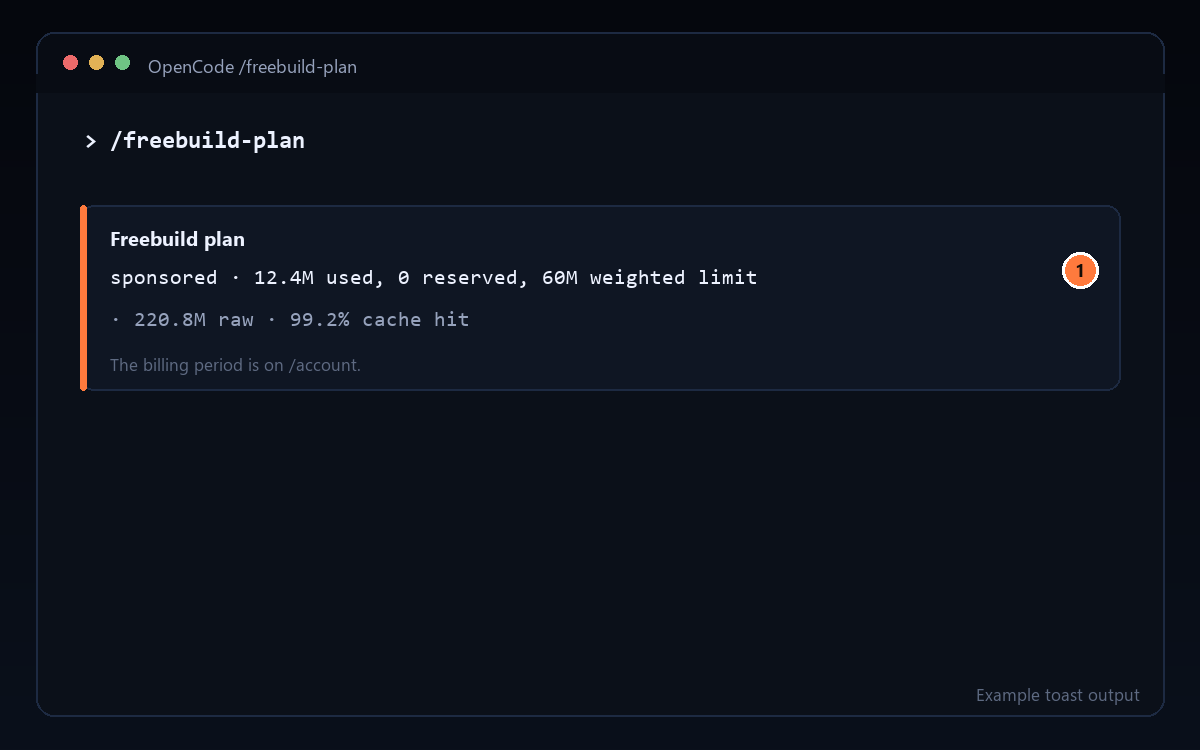
/freebuild-plan toast shows the plan label, weighted usage, raw tokens, and cache hit rate. The billing period is on /account.You should see: a one-line toast with the plan label, weighted used and limit, raw tokens, and cache hit rate. The billing period is on /account.
Browser-first install
Use this if you want to buy on freebuild.dev first. You still need the plugin to use the key.
/freebuild-key.Install the plugin
Run this in your normal terminal and restart OpenCode.
opencode plugin add @freebuild/opencode@latest
You should see: the plugin install message. Quit every OpenCode window and reopen it.
Open pricing and choose a plan
Use the pricing page on the same site. Click Buy Lite in browser or Buy Standard in browser.
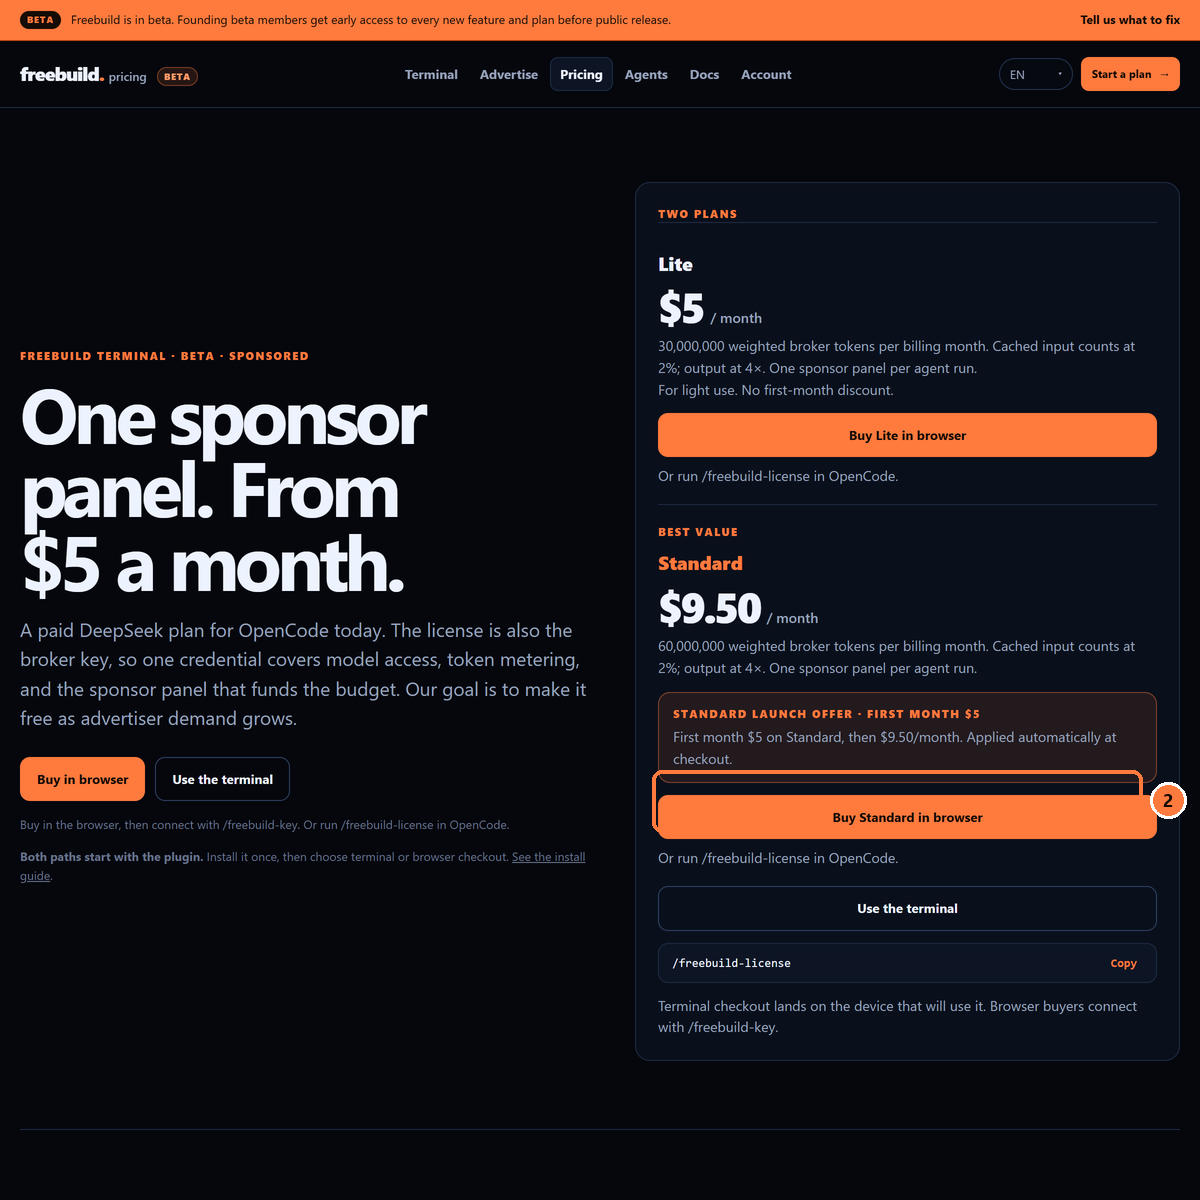
You should see: the plan cards and the browser checkout buttons.
Verify your email
This is the same email verification as the terminal path. The address receives the one-time license link after checkout.
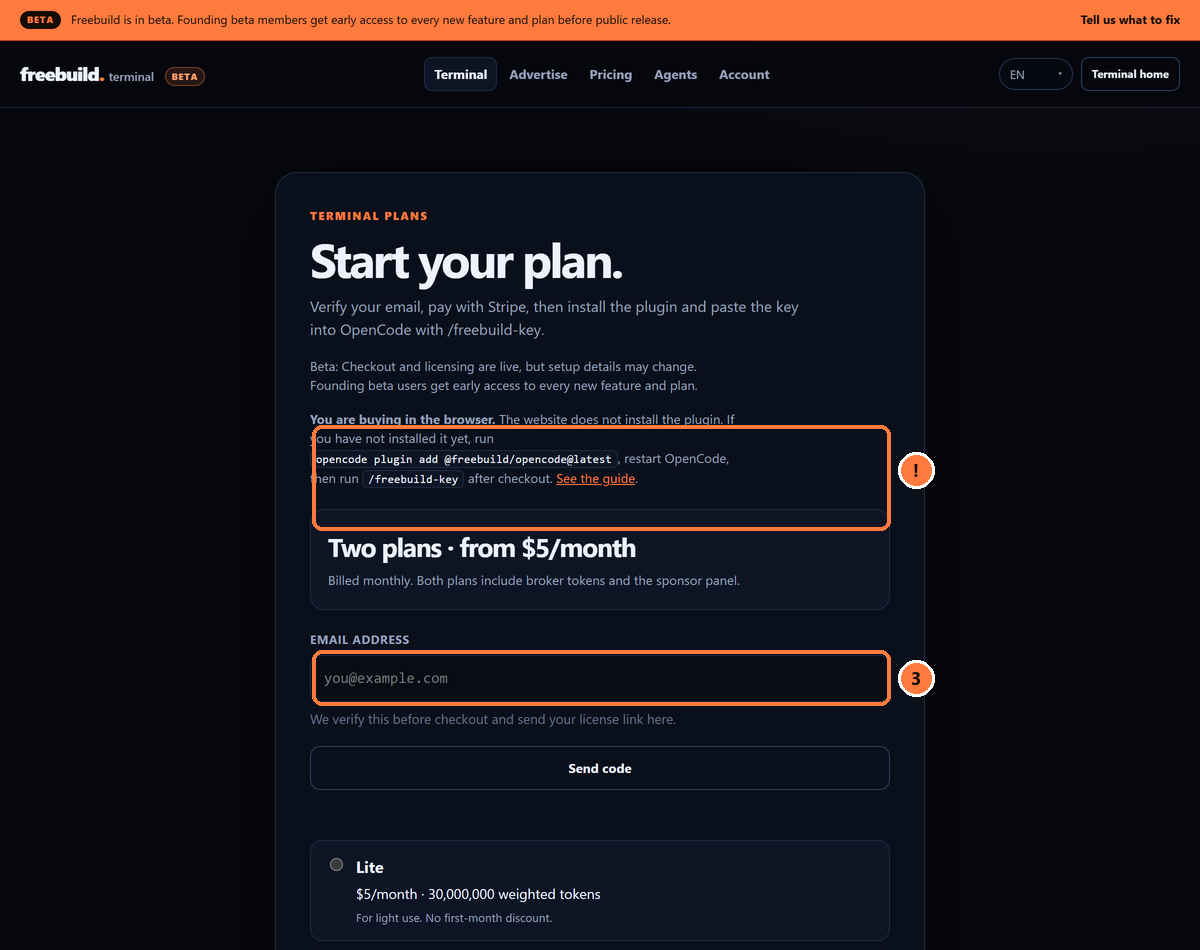
Start your plan and ends with /freebuild-key.You should see: Email verified. Continue to checkout.
Pay
Finish Stripe Checkout. Standard is $5 for the first month, then $9.50/month. Lite is $5/month.
You should see: the plan name and the first-month total.
Save the key
The success page shows the license key. Copy it now. The same key is in the license email through a one-time link.
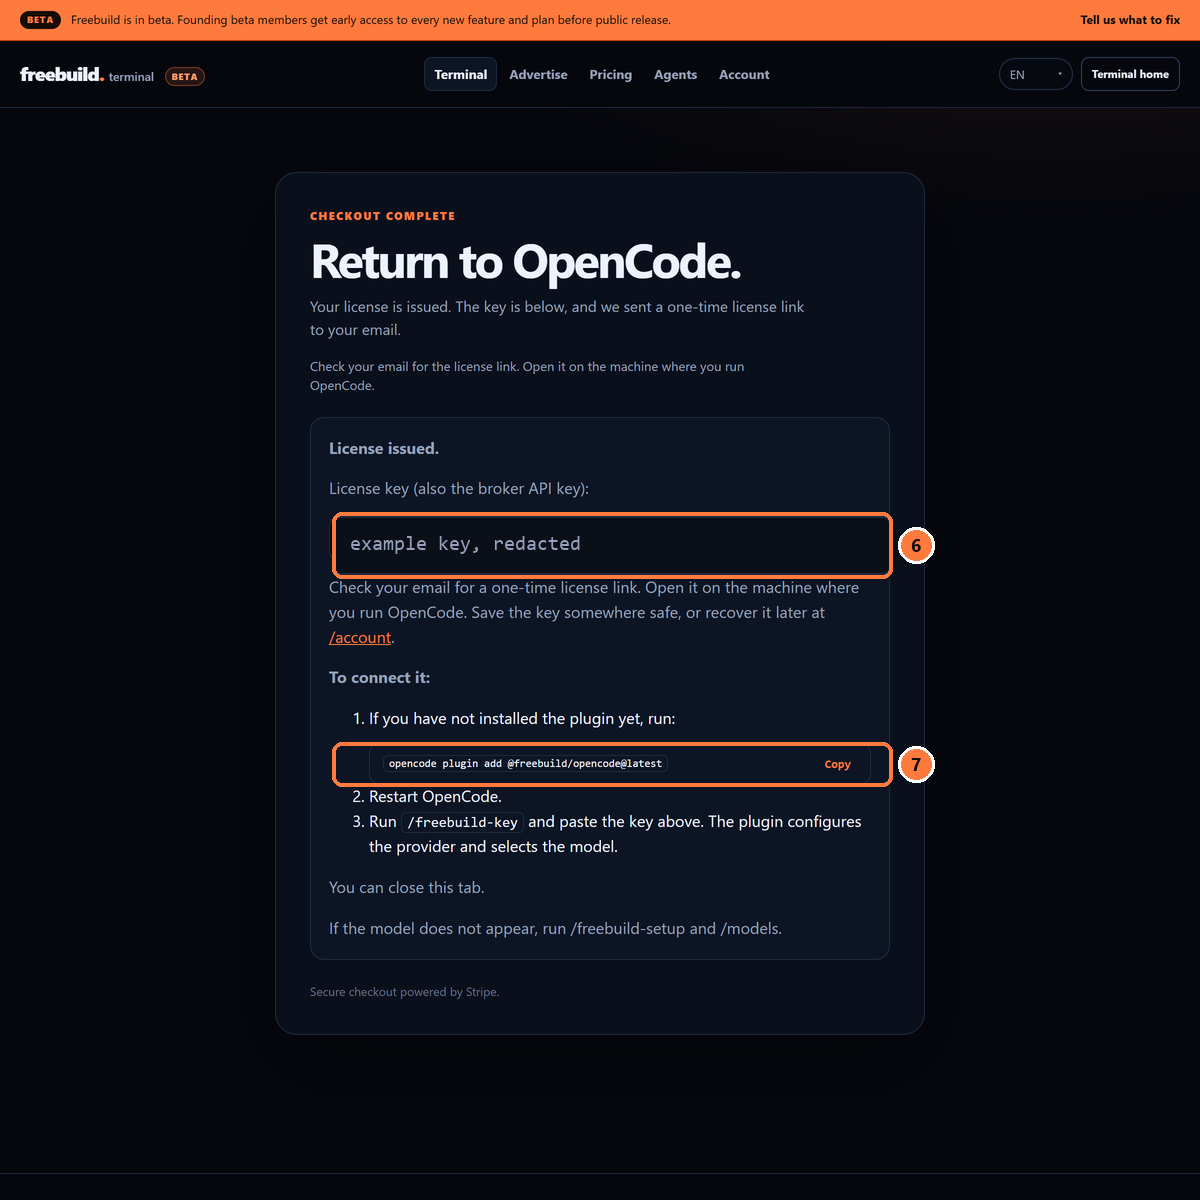
You should see: the key, the email note, and the three connect steps.
Open the license email
If you did not save the key, open the one-time link. It opens the account page and reveals the key.
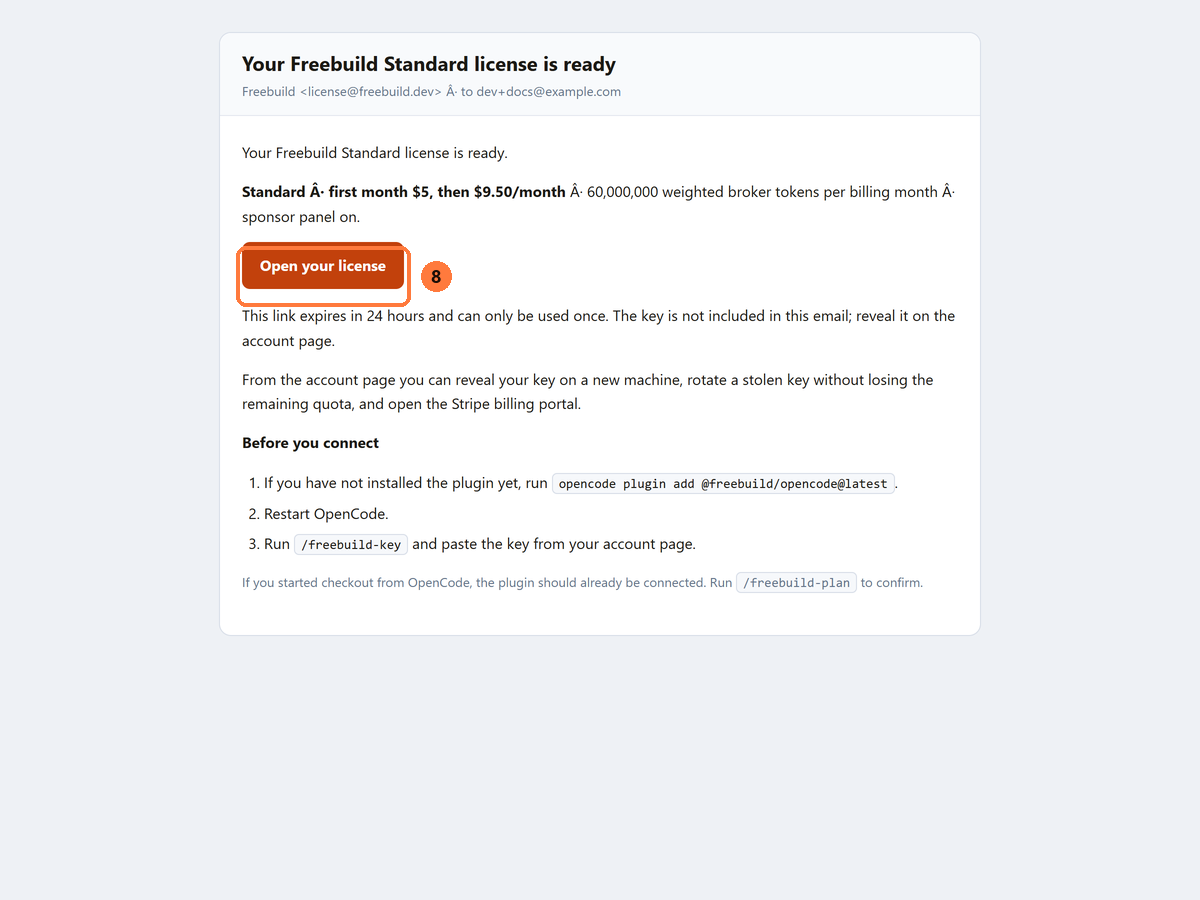
You should see: the plan, the token limit, and the Open your license button.
Connect in OpenCode
Paste the key. The plugin validates it before saving anything, writes the provider config, connects the credential, and selects the model.
/freebuild-key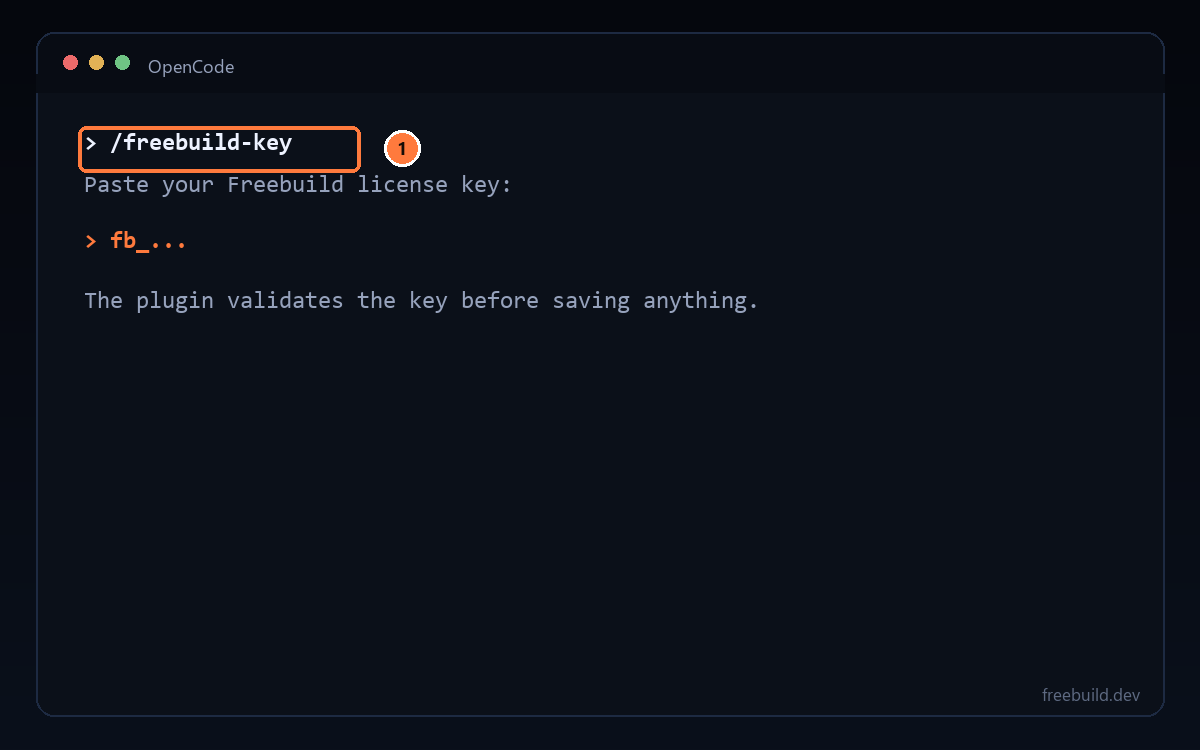
/freebuild-key. Terminal buyers skip this step.You should see: the provider configured and the Freebuild model selected.
Verify it works
Run the same checks as the terminal-first path.
/freebuild-plan
You should see: a one-line toast with the plan label, weighted used and limit, raw tokens, and cache hit rate. The billing period is on /account.
Verify it works
Run these two commands after either path:
/freebuild-plan/models/freebuild-planshows the plan label, weighted used and limit, raw tokens, cache hit rate, and reservations. The billing period is on/account./modelsshows Freebuild and DeepSeek V4.1 Flash 1017.- Run one prompt. The sponsor panel appears while the agent works.
/freebuild-setup, then restart OpenCode. This is a repair command, not a required setup step.Mobile handoff
The terminal runs on desktop. If you start on a phone, use the website to send yourself a desktop link.
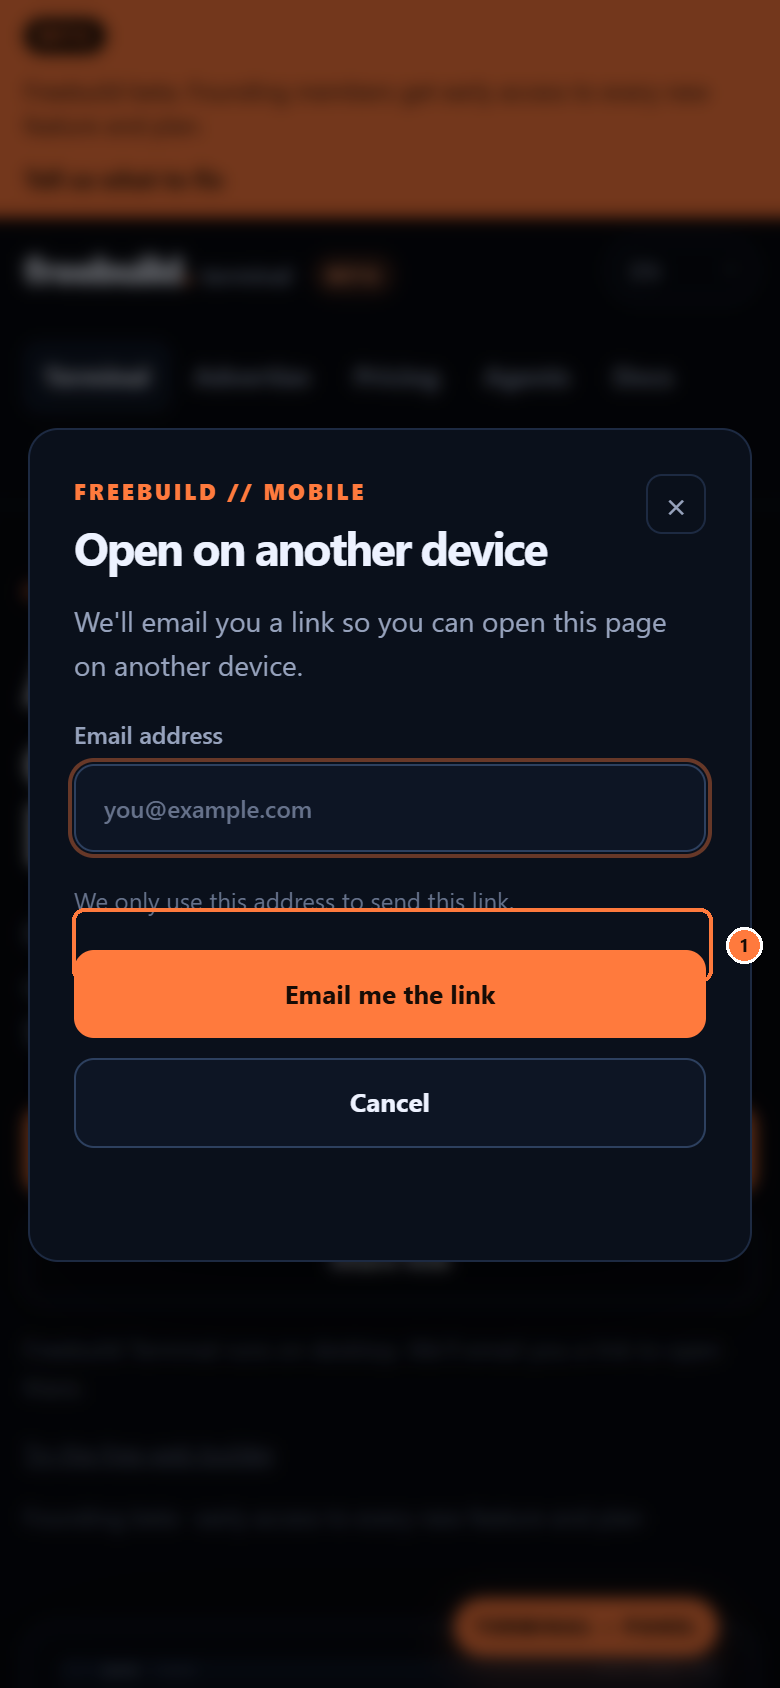
Open the mobile dialog
On the home page, click On mobile? and enter your email. The button says Email me the link.
Open the link on desktop
The link opens /start/. You should see the handoff note, then the plugin install steps.
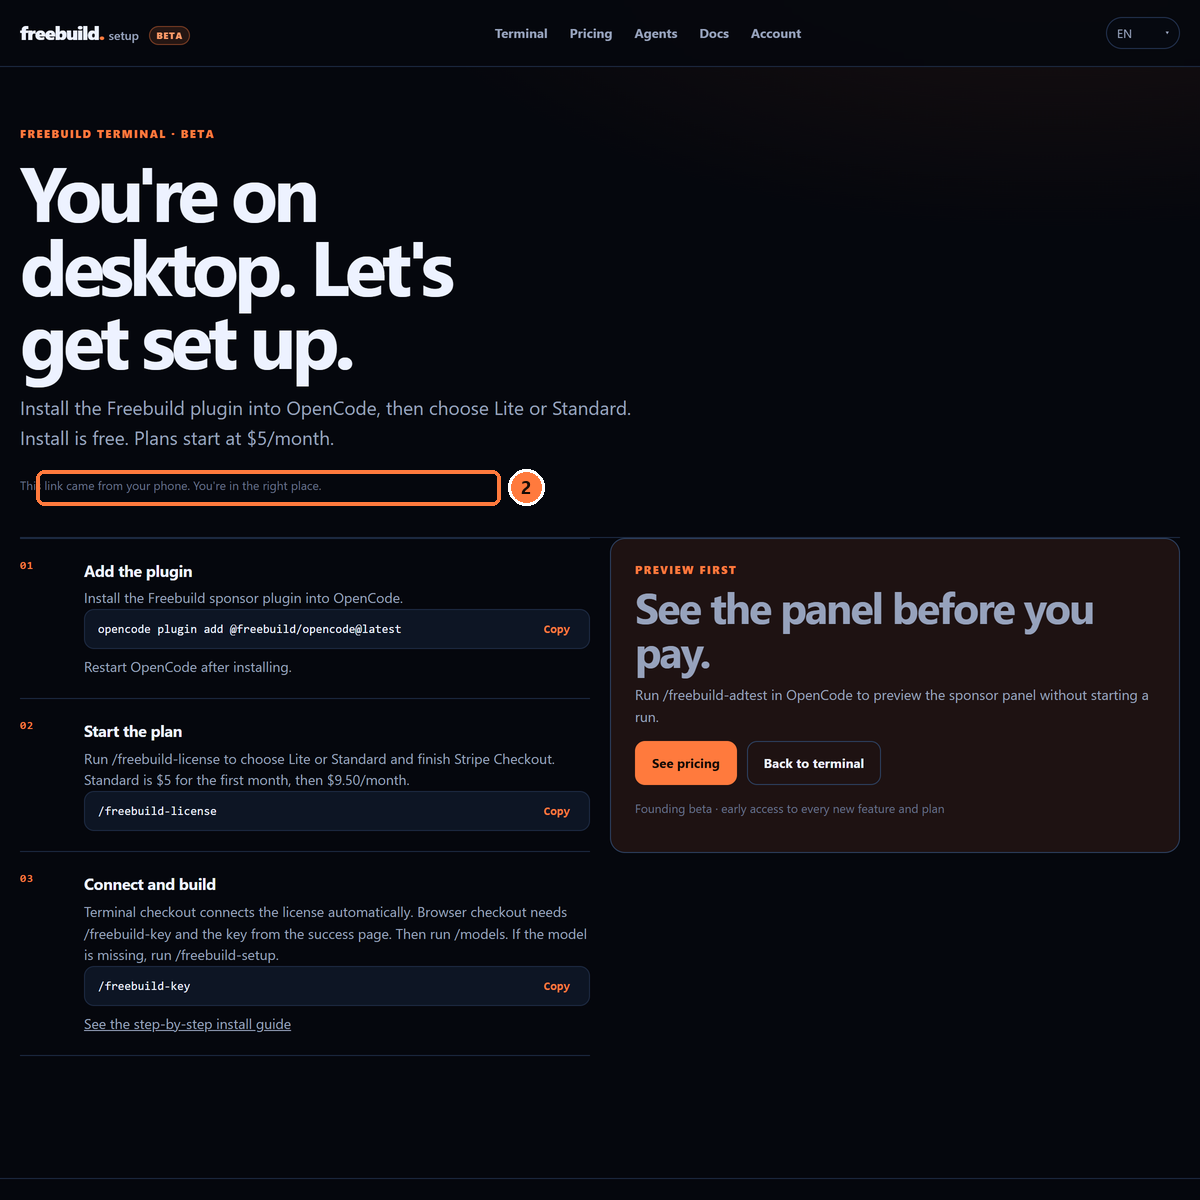
You should see: This link came from your phone. You're in the right place.
/freebuild-key.Troubleshooting
| Message | What it means | What to do |
|---|---|---|
install_mismatch | The license is bound to a different OpenCode install. | Close every OpenCode window, make sure no old opencode process remains, reopen, then run /freebuild-plan. |
install_required | The request did not include the install ID. | Reinstall the plugin, restart OpenCode, then run /freebuild-key again. |
Freebuild missing from /models | The provider config is not loaded. | Run /freebuild-setup, then restart OpenCode. |
401 or invalid license | The key was revoked, rotated, or the subscription is inactive. | Get the current key from /account and paste it with /freebuild-key. |
email_not_verified | Checkout was started before the email code was verified. | Go back to the activation page, verify the email, then continue to checkout. |
code_used | The founding code was already claimed. | Use the license email or /freebuild-key. Do not start a second checkout. |
email_used | That email already has founding access. | Recover the existing key from /account or run /freebuild-key. |
code_reserved | Another checkout is already using the code. | Finish or cancel the other checkout, then try again. |
| Broker unreachable | The terminal cannot reach the broker. | Check your network, then retry. The sponsor panel also needs broker access. |
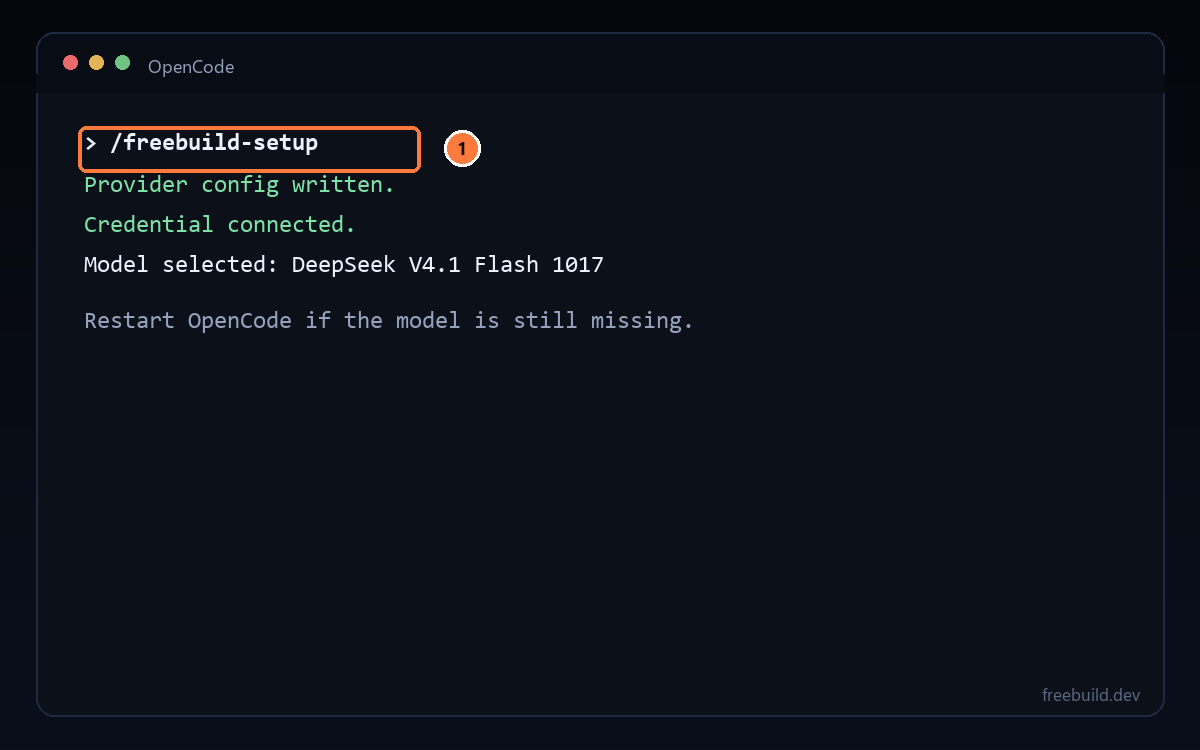
/freebuild-setup is the repair command. It is not required on a clean install.Next
Read the full documentation for token weighting, sponsor panel behavior, billing, and the command list. Compare plans on the pricing page.